As promised, here's a tutorial (hopefully the first of many) on some of the ways I use Photoshop's brushes. (For those of you who are already Photoshop experts, this will probably be a bit of a repeat. Oh, and for this tutorial, I'm using Photoshop 7. Anyone working with an earlier version won't be able to play along. If you have a later version, you'll have a few more bells and whistles, but the basics are the same.)
For the longest time, I had trouble painting from scratch in Photoshop. I just couldn't do the kind of things with the PS brushes that I could with traditional brushes. All that changed with the brush controls Adobe introduced in Photoshop 7 (which actually owes a big debt of gratitude to the Painter brush controls, from which PS "borrowed" liberally. But then they borrow from each other. Right? ;)
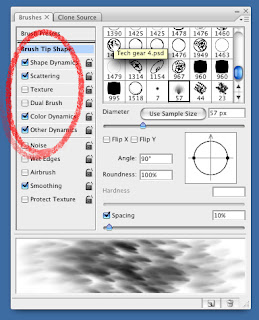
You'll find the brush controls on the "Brush" palette.
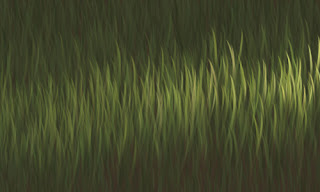
In a practical application using the old brushes, if I wanted to paint grass, I'd have to paint each blade individually. With the new brushes, I can paint an entire field of grass with just a few brush strokes.
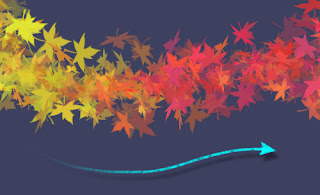
Using the PS brush controls you can create brushes that have all kinds of variations and textures. There are controls for Shape, scattering, color, texture etc. Try experimenting a little, and you'll start to see the possibilities.
Here's one of the stock Photoshop brushes with a whole bunch of brush control variations turned on. (This a single stroke, by the way.)
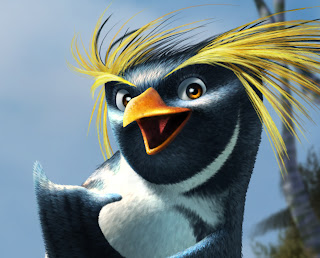
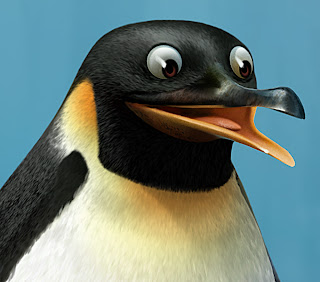
In the following tutorial, I'll explain how I used Photoshop's brushes to paint the feathers on Cody from "Surf's Up - post #12".
The first thing I do when painting anything, whether traditionally or digitally, is choose an appropriate brush. I'm a big fan of letting the brush do the work. If I'm painting hair, I want to choose a brush that makes marks that look like hair. One of my favorite things about digital painting is you can make brushes that work like rubber stamps on steroids.
For painting Cody's feathers, I figured rather than trying to make brush strokes that look like feathers, why not paint a feather, and use it as a brush. And that's exactly what I did.
If you've never made a Photoshop brush...here's how you do it:
Any image can be turned into a brush. Photoshop uses gray scale info to make brushes. Simply put a selection marquee around an image you want to turn into a brush, and pull down the "Edit" menu to "Define Brush". In this case, a painting of a single penguin feather. Keep in mind that dark pixels will become your brush. (Black pixels will be solid, gray pixels will be semi-transparent, and white pixels will be empty space.)
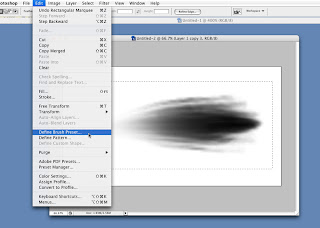
Once you've got your brush defined, you can do all sorts of fancy things with it by using the brush controls in the Brush Palette.
To add brush controls, click on the button that corresponds to the aspect you want to adjust (Shape Dynamic, Scatter, Texture etc.) Clicking the square turns the dynamic on or off. Clicking the word itself brings up an adjustment menu.
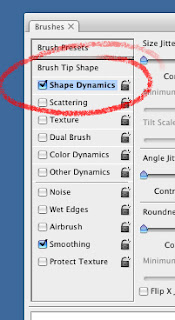
Here are the dynamics I used on one of my favorite feather brush:
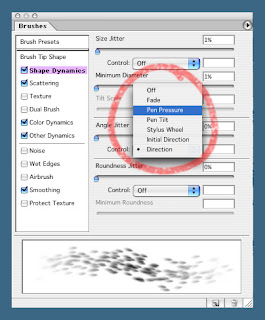
Shape Dynamics
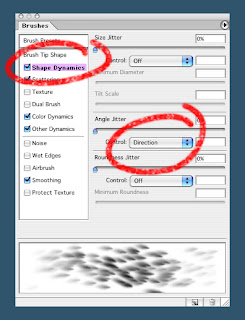
The only shape dynamic I use with this particular brush, is "Direction" which allows me to control the orientation of the "rubber stamped" brush strokes with the direction of my pen stroke. This makes "combing" the feathers (or hair) really easy. By rotating the compass looking thing on the brush palette, you can orient your brush to make marks that go with the direction of stroke...
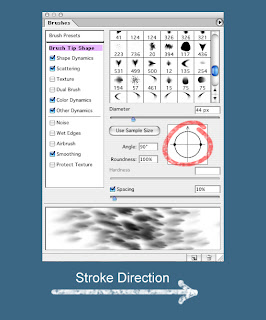
against the direction of stroke...
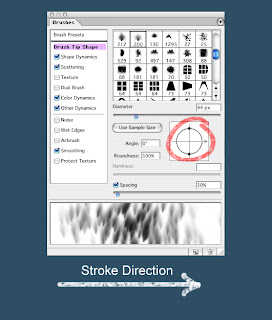
or anything in between.
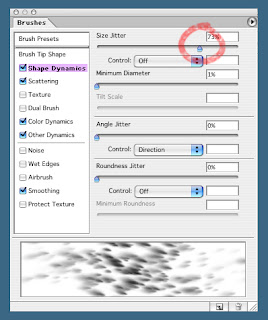
Other shape dynamics that I use quit a bit (though not for this particular brush,) are:
Size Jitter (variation)...
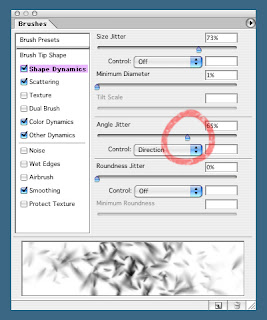
Angle Jitter, which controls the rotation of the brush...
and Roundness Jitter, which controls the squeeze of the brush (This has nothing to do with the round shape in this example. I used a round brush because the feather brush didn't show off the squeeze effect very well.)
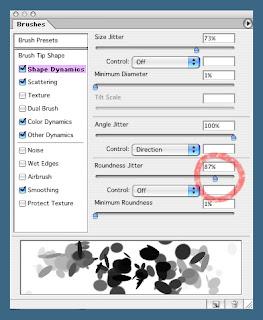
Control
All of these dynamics, as well as most of the other brush dynamics can either be simply on or off, or they can be controlled by your stylus.
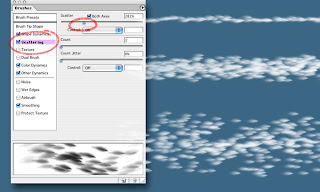
Scattering
Scattering does exactly what it sounds like...it scatters your brush strokes. There are a few options for the amount and density of scatter. Try experimenting. I tend to change this dynamic often while I'm working, depending on my immediate need.
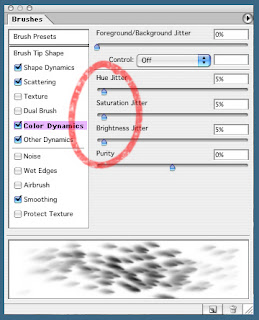
Color Dynamics
There are a number of ways to use the color dynamics. I tend to use it simply as a way of quickly getting subtle color variation into a scattered brush stroke. I do this by adjusting the Hue Jitter, Saturation Jitter, and Brightness jitter. Usually I set them all somewhere between 2% and 5% (higher if I want more color contrast).
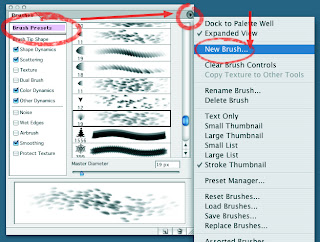
Once you've got your custom brush the way you like it, it's a good idea to save it so you can get back to it later. You can do that in the "Brush Presets" section of the brush palette. Click on the arrow at the top right (the list icon, for later versions of Photoshop), and pull down to New Brush.
So if you're still with me, it's time to start painting!
***Warning! Rule alert!***
This is an example of one method I used to paint feathers. It's by no means the only method. Please don't take this as the definitive way to work. I'm constantly breaking my own rules and trying to come up with different ways of doing things. It keeps things fresh, and forces me to not get too "technique-y".I'll start with a basic flat lay-in with all my brush dynamics turned on. Of course, when I say flat, I simply mean I'm not doing any rendering beyond what the color, shape and scattering dynamics do automatically. I usually start with a mid value color...
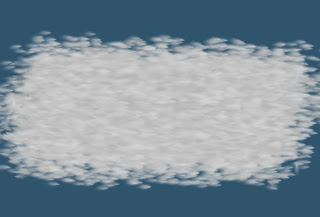
...and work my way outward, by building up my lights and shadows. Like with traditional media, I try to keep my lights opaque, and my shadows transparent, which makes the light areas pop out and the shadows recede.
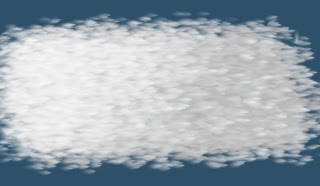
For the black feathers I do the same thing as I did for the light, just with a dark color. Normally, I'd do this on a second layer so I can work on the black areas and the white areas separately, as well as the transition areas. Again, I start flat (ish)...
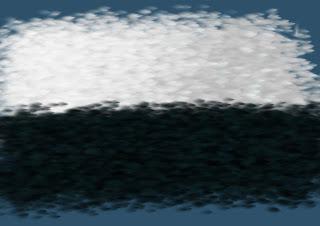
...and build up lighting as I go.
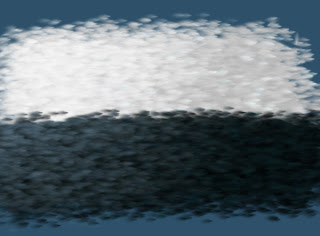
To control the transition area, I pull way back on the level of scatter, and adjust the spacing in order to give me a brush that's only a few feathers wide.
Here's another example of a finished feather painting.
46 comments:
Hi Paul,
Thanks very much for that indepth and very helpful tutorial. I was curious to find out how you handled the penguin feathers - and now I know!
Up til now I've mainly been working in traditional media when it comes to painting but you've opened my eyes to what a great tool photoshop can be. I'm going to try out the techniques you've shown and see what I can come up with.
Thanks!
Dan
Genial!!
yay! superbe, tnx for this tutorial, i was really wondering how you did those feathers :D
only 1 little problem, seems that there are some pics in this post that doesn't show, please fix :)
THANK YOU!
Hi gang,
Thanks for the response.
Pandora,
Sorry you're not getting all the images. Is anyone else having trouble getting all the images? They're coming through fine on my computer. Hmmm.
i`ve tried different browsers and still just half of the images load :(
but its ok for me, i already tried your brush tutorial and works great
if you have some time here are some brush sets i use, not made by me but by other great artists, try them! :)
i forgot the link:
http://www.pandemoniumart.net/brushes/
:D
Hey Paul,
Man thanks for posting your work and helpful tutorials. I am truly amazed and inspired..and on occasions frustrated (how does he do that!@!?..) by your brilliant paintings. Excited to see what's coming next this year.
ericn.
Thank you so much for this excellent tutorial!:D I'm already inspired to make some new brushes today...it's funny, but my mind is still working in the "old school" way (even though I've been using a computer for 10 years now)...so I thought you painted it...well..one by one! :0
Happy New Year Paul-fantastic tutorial, thnx for taking the time to post that. However, on my computer the first several images don't show up either.
Great tutorial! Thank you for posting this! Happy new year! :)
"direction" was a great discovery for me like a month ago, Ive been using it like crazy ever since. Thanks for taking the time to do this lengthy tutorial. It would be great to read some tips on improving composition and color sense which you really nail.great great blog.
Paul? Thank you SO MUCH for posting this. Me and Photoshop = my grandmother and computers. Non-compatible. I don't know what half the stuff does, and the manual made my eyes bleed tech jargon for days. I never knew what all those controls did till now!
...and my first thought after experimenting with (and finding out YES THERE'S A LEAF BRUSH, duh, woman) the leaf brush: Now I can make WRAPPING PAPER!
Now that's a use I bet it was never meant to be put to...
--Shuku
Jewelry class today! PUBLIC HOLIDAY!
Shuku,
Yes there's a leaf brush...there are a few in fact, but you don't need to use theirs. You can make you own! Just paint a black leaf against a white BG, put a selection box around it, pull down the EDIT menu, go to DEFINE BRUSH, and voila, wrapping papar until you die!
Man, this is an amazing tutorial. I've got to print this out and start learning! Thanks!
your blog makes me weep! You sir are no less than astounding!
Thanks very much!
Wow awesome tutorial! Thanks so much for sharing your knowledge! I can't wait to try this right now..
Great stuff..thanks for taking to time to demo..cheers! Will try!
Great stuff! It is fun to see how different artists "solve" problems. It is refreshing to see that you seem so comfortable using both digital and traditional tools and are able to reap the benefits of both. Thanks so much for sharing, I look forward to "hopefully" more tutorials!
What is your deviantART account?
Thanks for posting this Paul. You are an open book, and perhaps one of the most generous persons I've ever had the privilage of working with. It's good to see you're extended this generousity across the globe as well.
Thanks for taking the time to do this stuff. I've always kind of avoided playing with brush controls, but after watching this tutorial I really think I should start paying more attention to them... :)
Thanks a lot !
Amazing tutorial, Paul! Your explanation of the direction function(combing on feathers) is the dicovery of the year for me. I've been trying to figure out that one for a long time now. Thanks so much for taking the time to break it down.
Keep up the incredible work!
Cool tutorial. And looking forward to many more. :)
Thanks so much for putting this together. The color variation was something I've never used, you've given my paintings some new life!
Excellent Job!
Paul
I am teaching a photoshop class and was looking for a good tutorial on brush use and creation. you have made it very easy to understand.
Well done!
thanks
paul
many thanks for posting that great tutorial!!
Fantastic!!! I'm glad I found this.
Thanks for all man!
Your work is awesome!!!
Thank you for this helpful tutorial ! That is very generous from you to reveal these tricks. I will try it as soon as I can...
Thanks again !
Hiya! I just found this tutorial through a Google search for PS brush tips, and I just wanted to say that you've helped me quite a bit. ;) Thanks for posting this, and you do some pretty awesome work. :3
ur tutorial looks easy to understand. i would definitely bookmark it.
great tutorial :)
http://qbrushes.com
Thanks for your Helpful tutorial...better than u can improve your tutorial...briefly.....Ashok....
Thanks for posting this. Very instructive and informative.
Thank you so much for sharing this tutorial with everyone!
many many thanx Paul. Very interesting tutorial.
Thanks very much for that indepth and very helpful tutorial. I was curious to find out how you handled the penguin feathers - and now I know!NFL Jerseys
tn chaussures
chaussures puma
Tn Requin
Thanks very much for that indepth and very helpful tutorial. I was curious to find out how you handled the penguin feathers - and now I know!NFL Jerseys
tn chaussures
chaussures puma
Tn Requin
Cheap Polo Shirts
Thank you so much for sharing!
Thanks you so much for sharing!
Awesome tutorial! I always forget I can create my own brushes. I'm getting ready to do a digital painting of an eagle, and this info will really come in handy for his feathers. Also, I'm a fellow Oregonian. Yay!
You have done such an amazing job on this series. I envy your sewing skills and your patience and your diligence. If anyone ever asks me how to sew, I'm sending them to your blog and this series. Congratulations on such an extensive, well thought out and clearly presented set of this Photoshop tutorial.
Thanks,
Edd
Designer@ Background Removal Service/Clipping Path/Clipping Path Service/Neck Joint Service/Image Masking Service/Color Correction Service/Background Removing Service/Photo Retouching Services/Background Remover
Thanks a lot :)
I really like your works because of its uniqueness…wish have contact with you to learn more from your post.
Great tutorial, I found what i was looking for and this is gonna help me a lot.
Thanks a lot to the Team and Best of luck for still more to come!!
Post a Comment